Category Archives: Step-By-Step

Descriptions of the various technologies. Please read the full description before you begin to avoid mistakes.

Character map with Silhouette Studio

Many of the most beautiful fonts that are popular today use more characters than we can easily get out of the keyboard. The fonts has extra squiggles and shapes that can only be found through the Character Map.
I’m going to show you how you most easily find these goodies and get them into the Silhouette Studio so that you can cut out that lovely saying you want on a pillow.

I use Windows 7. If you are using a different version of Windows it can be a little tricky, but patience will solve it I’m sure.

Character MapThe little program that can display some extra characters is Character Map and the icon is a small key with some mysterious signs on it. This program comes with Windows, so there is no need to install it.

Run

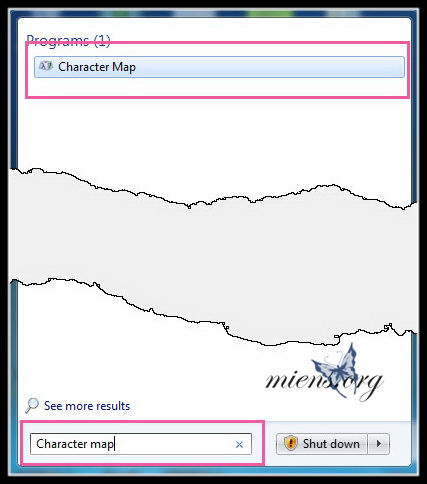
Click the Start menu and in the box labeled Run, type Character Map. When you type in the word you will see several proposals pop up in the list so you do not need to enter the full name. Choose the right program and click on it so that it starts.
(You can also check manually on your start menu and then you will probably find it under Accessories  and then System Tools)

Also start Silhouette Studio and select the font you want to use (NOTE !! This works in the same way no matter which application you write in, try Photoshop, Word or another program, the approach’s the same)

Silhouette text

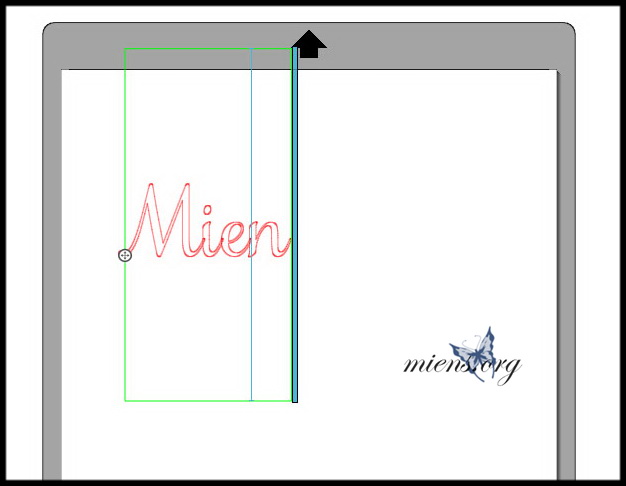
Enter your word and leave the text tool still active. Do not move your word or making any other changes. When you have released the Text tool you can’t change the word.
I chose the font Samantha Upright, and I want more squiggles in the text than what’s visible here.

Change programs and bring up Character Map on your screen.

Font

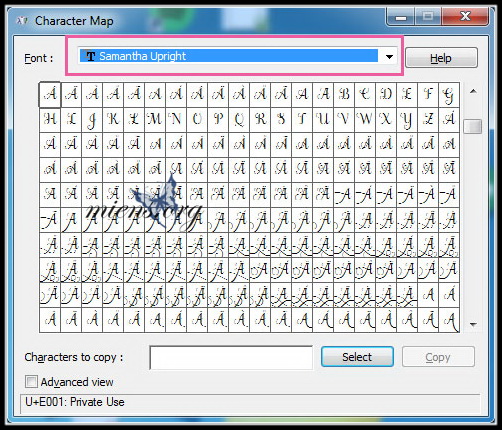
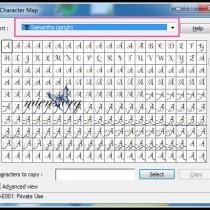
Select the font you used in Silhouette Studio, and then scroll until you find the character you want to use (do not scroll with the mouse wheel at once, that change the font, instead use the scroll bar to the right)Character

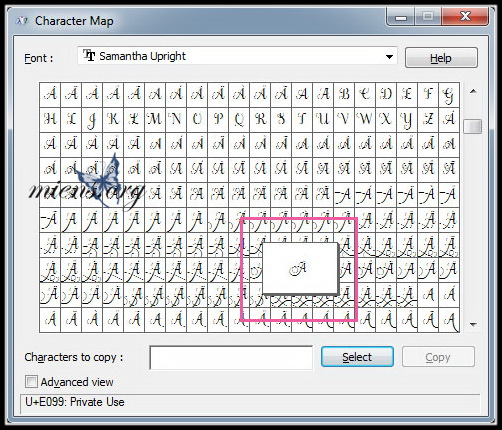
Choose the various characters to better see how they look.

Select

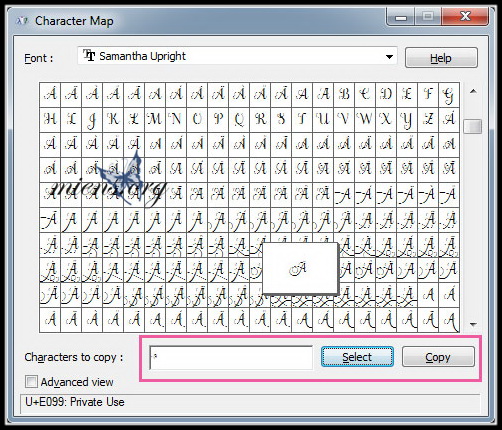
Once you find what you want, choose Select. The character will now appear in the white box. If you want more characters that will follow one another you can choose the next one right away. When you are done, click Copy (Don’t forget to erase the character in the white box if you want another.)

Silhuette Text

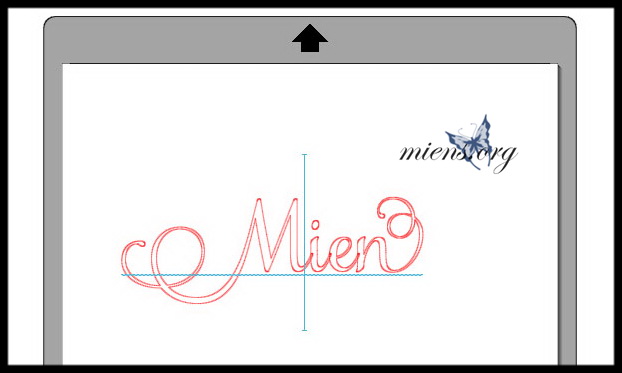
Go back to the Silhouette Studio. Move the cursor (via arrow keys) and erase the letter you want to change. Then press Ctrl + V to paste the new character. The above looks good and much more fun than the first version, right?

Character Map is also very useful if you have a font that’s a DingBat (all letters are a small image). It is easy to find just the image you want to use.

Print & Cut with the Silhouette

Silhouette Studio has a feature called Print & Cut. I like this feature and use it to print pictures and cut them with the Silhouette. I then use them as a motif on cards and other things I create.

We start from the beginning and take a look in Silhouette Store. How do I know that the file I buy is a Print & Cut?

Silhouette Store

To begin with, you can use Filters if you are sure that it’s a Print & Cut file you want. Otherwise, you will see it on the little blue box with a P next to the price.

Silhouette library

After purchasing a file and it is located in your library you find the same symbol at most of the files. I have no knowledge of why not all are shown with the symbol, it can be rally annoying sometimes. The rose in the center of this picture is also a Print & Cut, but it’s hard to know without the symbol.
If you know why, please leave a coment to this post. I whant to know!

Change the properties of the file

My solution to this problem is to change the name of the file. You do this by right clicking on the image and choose Edit Properties.

Edit properties

Here you can change the search term, information and the name of the file. I choose to add PnC to the filename.

New name

Close the library and open it again (or change file), now you see the new name and you get a clue as to what file it is.

Shall we get started then? With the actual printing and cutting?

Start by changing the paper to A4, letter or what size your printer use, especially if you use a Silhouette Cameo. Since we are printing these shapes, the paper must fit in to your printer.

Shapes on the mat

Choose your shapes and place those on the mat, just as you do when you want to cut out a shape. If you look at my figures you will see that two have white backgrounds. That’s not important, it’s more that the person who made the file might not have been as accurate as I would like.

Registration marks

Open the Registration Marks. You’ll find it right in the tool menu.

Use Registration Marks

Change the settings needed. Right now, just change the type of machine you have. I have an old friend, so I choose Original. The positions can be left as is, even though they can easily be moved to save paper.

Registration marks on the mat

As you see now, I have my shapes at the wrong place. It is the black corners that will be printed with your shapes. These corners can be moved (see above), but we are content to have those where they are this time.

Move the shapes

Move the figures inside the markings.
Then cut the paper you want to use in order to fit your printer. A cardstock or similar paper (12″x12″) you cut to 21×29,7 cm (A4).
Place your paper in the printer. Remember to have any structure in the right direction if you want it visible or not in your figures. Make sure you printer are online.

Print you shapes

Usually it’s about now that you click Send to Silhouette, but we should send it all to your printer instead. Click on the printer icon and print the same way as you normally print documents. I recommend to print in high quality when you know you really want to use the shape.
Don’t do anything with the document in Silhouette Studio while the printer is working.

Fresh from the printer

Now you have a paper that should look something like this. The mark in the bottom corner is not visible on this picture. If you have a Cameo, you may have other types of marks.

Feed it to the machine

Attach your paper to the cutting mat and feed it to the Silhouette just the way you usually do. My old model is practically hand cranked, so do as you are accustomed to do.

Cut Settings

Now you’re on familiar ground. Select the type of paper you used, in this case, cardstock, and start the cutting.
Your paper will go in and out of the machine when it tries to find the black markings. As soon as that’s done the Silhouette starts to cut.

All Done

Now you have one or more shapes to decorate what you want with.

As you probably noticed in this blog, I like to craft with paper, but I know that it is possible to print on a certain type of vinyl and other media. The procedure is the same, but I can not answer how these materials behave or how you use them.


Note:
All files aren’t great, you might have to work a little by your self to get them the way you want. The cow I have used have the cut line a few millimeters off the edge, and the rose isn’t cut between the stems. (A little hard to see here, but it’s easier of the previous photo)

Quality of the shapes


Make your own wreath body

You can find dozen and dozen ways to decorate a wreath for you door online, but it can be a little bit harder to find the perfect body for your wreath. Either it’s too small or too large, or perhaps the wrong materials.
If you want to cover the hole body, it’s easy to do the body your self, you only need to visit a har
dware store.
Buy a piece of pipe insulation that are pre-cut on one side. You also need a little silver tape or other sturdy tape and a knife.

Material to make your own Wreath body

I chose a piece of pipe insulation that has an outer diameter of 41mm, but you can choose a thicker or thinner if you want. What is important is that it is pre-cut.
Measure how big wreath you want and cut off the excess material. I do not want my super big, so I cut off 26 cm.

Open up with a knive

Carefully cut up the last of the pre-cut so that you can open the pipe completely. In order to make the pipe into a circle that keeps it’s shape you need the inside to be less than the outside of the circle. The slit side should therefore be our outside as it can be split up and thus become larger. Try to bend in different directions and you’ll see the difference.

Use tape to seal

Put the ends of the tube together and wrap a few turns of the tape. Make sure it is seated. Work  over your wreath body so that it is uniform throughout. The pipe splits little on where you cut it up, but press and rotate a bit so you get it evenly.

The outside is finish

You should almost not be able to see the joint when you are done.

The body are done

You have finished your wreath body and can decorate it as desired.