Now that your account on Instagram is registered you may want to post your own pictures and find more people to follow?
We start here with uploading your own picture. Make sure you have an image on your phone or tablet that you feel you can add up.
Start the app Instagram
On the following pictures you will see three buttons that’s on my tablet, they have nothing to do with Instagram so just ignore them 🙂

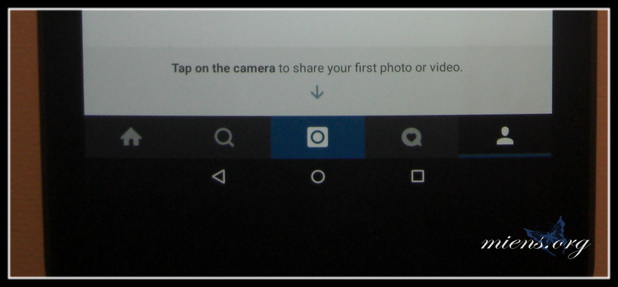
Let’s begin with some more buttons. Along the bottom are four buttons. I describe them left to right.
1. House. This is your flow, here you will find all the pictures that the people you follow have published.
2. The magnifying glass. Do you want to search for a person or a hashtag? Search here.
3. Camera. Click here to upload a picture to your Instagram account.
4. Balloon. When someone likes one of your photos, comments on one of your photos or mentions you in a comment, you see it here.
5. Man. This is your profile. Here you can change your profile, view your own pictures and changing settings.
Now click on the camera, so we can put a photo on your Instagram.

The big picture is the image that is selected, below you’ll find the pictures that are on your phone or tablet. If you want to use an image stored on Dropbox, Google Photos or another cloud service, you must first download the image to your phone or tablet.
Under the pictures you have three options. Gallery showing pictures, Photo lets you take a photo right away and Video let you shoot a video instantly.
Let it stand at the Gallery and select an image you want to upload. Instagram using a format that is square. If your image is elongated, which is most common, you can move the image to get what you want in focus in the middle. Move around your image a bit to see how it looks. Click on the blue arrow at top right to get on when you are finished.

Now you are in the Edit, if you want to change the image, click the arrow at the upper left.
Here you can change the light in your image, go on and experiment with some different options.
Click your way around and see what happens to your image. Between your selected picture and the different options you have three buttons. On these you can change different things. Try it out so that you feel at home. When you are satisfied with your image, click on the blue arrow to the right.

Now you see your image as a tiny thumbnail and it’s time to write a small text to it. You type the text as usual with the keyboard that appears on the screen when you click on the Write a Caption …
There are some options here too.
Tag people – Here you can tag people in the picture you put up, just as you can tag people in photos on Facebook. Chose this and click on the face of the right person and enter their name.
Add to Photo Map – Here you can specify where the picture was taken (or where you are located). You can specify both a real place (New York) or a custom location (My crafting table). Drag the slider to the right to activate it or to the left to turn it off. Type in the place you want under the slide.
Share – Select where you want your image with text to appear in addition to Instagram. Right now you can not choose anything at all, because you have not paired Instagram with any other service yet.
If you look at the upper part of the screen you’ll see that you can choose two options here. Followers are selected by default, then all those who follow you see your picture. If instead you want to send an picture directly to a person, choose Direct. There you can select who should get the picture.
Are you ready to send your picture? If so, click on the blue check mark top right.

As soon as Instagram is finished your image is in your flow and the flow of all who follows you.
The next step is to check on some settings.