Make your own wreath body

You can find dozen and dozen ways to decorate a wreath for you door online, but it can be a little bit harder to find the perfect body for your wreath. Either it’s too small or too large, or perhaps the wrong materials.
If you want to cover the hole body, it’s easy to do the body your self, you only need to visit a har
dware store.
Buy a piece of pipe insulation that are pre-cut on one side. You also need a little silver tape or other sturdy tape and a knife.

Material to make your own Wreath body

I chose a piece of pipe insulation that has an outer diameter of 41mm, but you can choose a thicker or thinner if you want. What is important is that it is pre-cut.
Measure how big wreath you want and cut off the excess material. I do not want my super big, so I cut off 26 cm.

Open up with a knive

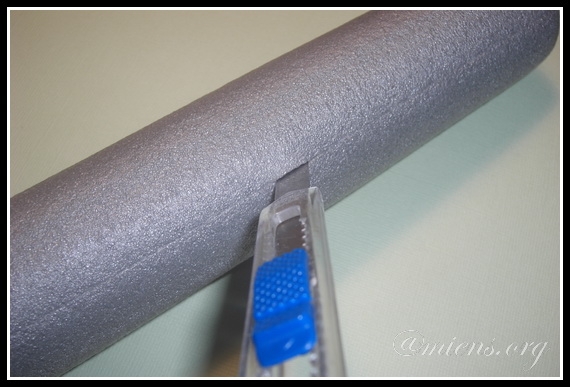
Carefully cut up the last of the pre-cut so that you can open the pipe completely. In order to make the pipe into a circle that keeps it’s shape you need the inside to be less than the outside of the circle. The slit side should therefore be our outside as it can be split up and thus become larger. Try to bend in different directions and you’ll see the difference.

Use tape to seal

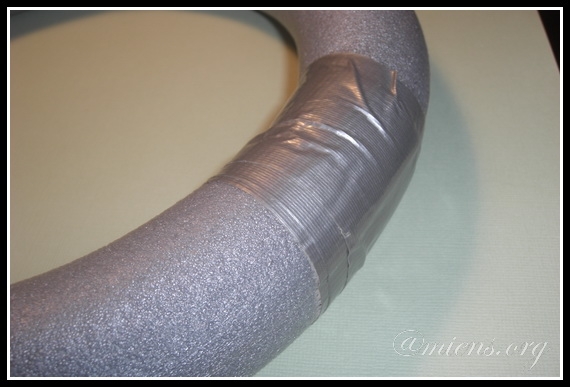
Put the ends of the tube together and wrap a few turns of the tape. Make sure it is seated. Work  over your wreath body so that it is uniform throughout. The pipe splits little on where you cut it up, but press and rotate a bit so you get it evenly.

The outside is finish

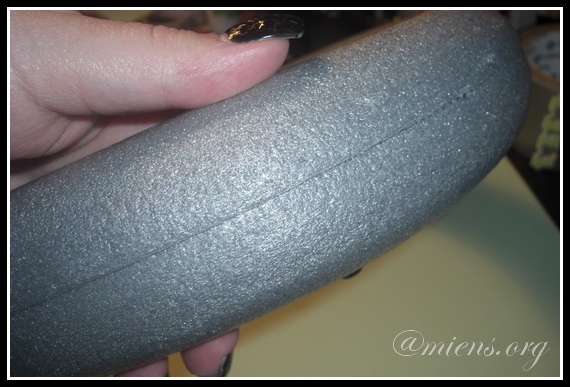
You should almost not be able to see the joint when you are done.

The body are done

You have finished your wreath body and can decorate it as desired.


How I sort my Stamps

I have lots of stamps and from the beginning I stored them in their original packaging. It worked fine when I only had 10-15 stamps, but my collection grew rapidly and I needed a new system.

Stamps that are mounted on wood or other bulky material I have in a drawer, but I avoid that kind of stamps as much as I can.

Stamps in the Cd-pocket - Sort your stamps

Back side in the Cd-pocket - Sort your stamps

In each pocket, on both sides, is a laminated sheet that stamps adheres to. They stay in your pockets without slipping around. On the back is the possibility of attaching images I use for masking. I use one A4 sized page to every pocket. I cut the sheets to 12×12 cm with rounded corners.
Each pocket is numbered in one corner.
I store the pockets in some type of box (the box is changed periodically when I either redo the crafting room or the drawer become worn out.)

Stamps in the binder - Sort your stamps

I use a binder (A5), that’s stands handy on my desk, to stamp a preview of all my stamps.
Even wood mounted are listed here. Each stamp gets a code (EZ, K, C, etc.) and the number of the pocket the stamp is placed in. It makes it easy to find the right stamp fast. I also have the opportunity to record labels, Angel Policy, if the stamps difficult to stamp with or anything else that might be good to remember.

My key

K – Wood (In Swedish we use the word Kloss (Block))
EZ – EZ mount
C – Clear stamp
F – Foam
X – The stamp is sold (I mark it with a X over the ordinary key)

Register for stamps - Sort your stamps

In the binder I have a register in which the stamps are sorted by designs. This is the first register I used, I have since changed it and changed again. As an example the tab Filurer became unnecessary when I sold all I had.