Get starting with Instagram – Part 1

This post is for those who want to get started with Instagram, but feel a little unsure of how it all works. Right now I go through how to register, how to add pictures and looking at other people’s photos is in Part 2.First and foremost, you must have the app Instagram. This you can find where you buy or download your normal apps (different depending on whether you are using an Android phone/plate or any of Appels products).
Then, start by downloading the app and launch it.
(And sorry for the unusually poor picture quality. All the lights hit the screen for me, so it was difficult to get to the really bright and nice pictures).

Get started with Instagram

This is the starting screen of Instagram. At the top you have two options; Sign up or Log In.

Get started with Instagram

We will Sign Up, so make sure it is selected (the small white arrow should be under the text).

Click (dabbing with your finger) Enter your e-mail. Then you get the keyboard and can type in your email address.
If you prefer to use Facebook as login, click Log in with Facebook. You will then receive login using your facebook account and can jump a bit down in this text.

For safety, I have not taken photos of the following steps, but it is not so difficult.
Once you have entered your email address you’ll see a small blue text that says Next. Click on it.
Enter your name, if you want. This is not mandatory, so you can skip this if you want. Click Next.
Time for a username. This is the name that will appear on your account. If it is completely wrong or if you want to change it sometime in the future, you can do this without any problems. Click Next when you are done. (if your username is already taken it says so just below the field).
A good password is one that is not directly associated with you and it gladly contain a few numbers or other characters (!? # &)

Get started with Instagram

When you come to this screen it’s time for a profile picture. The profile picture is round and appears next to your username. You have several ways to choose a picture, choose the way that suits you best.
I selected to upload a photo (Choose from Library), but if you what to select one from Facebook, or take a picture here and now it goes equally well.

Get started with Instagram

You can move the picture to focus on what you want as your profile picture. The profile picture can be replaced as easily as on Facebook if you change your mind and want another later.

Get started with Instagram

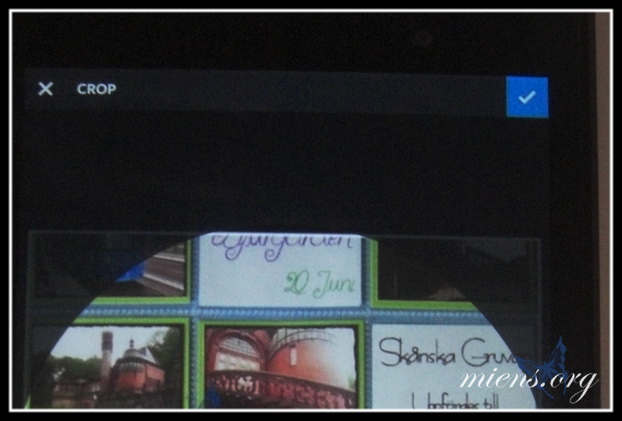
When you are satisfied with the image, click on the blue check mark on the top right to move forward.

Get started with Instagram

If you want Instagram to will find your friends from Facebook, click on the blue button. It may take a while for Instagram to go through your Facebook account, so have some patience. If you don’t want to find your friends from Facebook, click Skip at the top right.
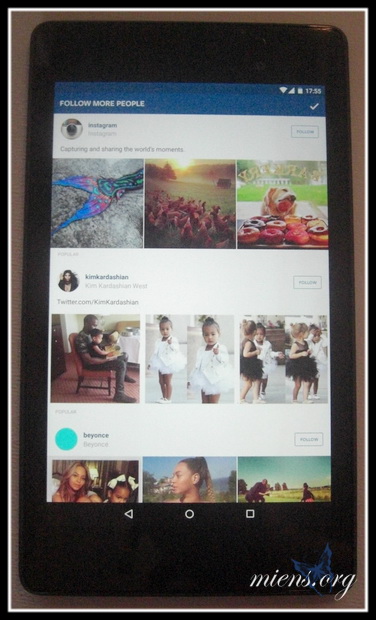
Instagram also want to check your contacts in the phone, but here you can select Skip also if you want.
Get started with Instagram
Now your account is up and running. Instagram suggest some popular people that you may want to follow.
Kom igång med Instagram
If you find something that looks interesting, click on the Follow above the profile you want to follow. When you are done, click the blue check mark at the top right. You can choose not to follow anyone if you want to.
Get started with Instagram
This is what your flow look like if you have not selected anything to follow, if you selected something in the step before you will see a lot of pictures.
How to upload your own pictures, write text, etc. you find in the next step.

Project Life

I have always said that I should stay away from Project Life (PL), just like I said I would not start scrapping. I must say it didn’t go very well with any of those promises”. I’m not yet in love with PL, but I’m probably on the way. At least that much that I yesterday bought more pockets for my binder.

I‘m not going to be so crazy that I make a picture a day or a spread a week. Then I would not have time for anything else. My plan is to do a monthly basis, with a couple of pictures from every month. So far, I have begun January, which was pretty boring, and made a page for June, which was much more fun 🙂

Project Life - 3x4

For January I picked a couple of photos, some pockets just got a picture with a date and some I manage to write some journaling to. The other side of this page is not ready yet, so I show you that at a later date. It is not so much the PL of my job yet, but I will get there.

Project Life - 3x4

Something I‘ve decided, is that at the beginning of each month I will write some kind of summary of the month. I must also remember which font I use so that I can share it with you here….


Project Life - 3x4

I’ve done a lot of PL-work the last few weeks (that why I haven’t written anything here), but nothing in my album. I have done some work with my Silhouette and will share it with all of you as soon as I used it my self.

Project Life - 2x2

I made my funny side with the photos from a walk on Royal Djurgården. The pockets are pretty small, 2×2 , but it turned out much better than I thought. The text is written with Sketch Pen by the Silhouette. The fonts are narrow so it looks as if it is just one line.

Project Life - 2x2

The Material list is unfortunately not complete this time.

Material list:


Decoreated pringels jar

I have decorated a small Pringels jar. I told my self to do just this in a couple of years and now I finally did it. It starts to get a bit of the shoemaker’s children here at home. I do a lot of things that I then give away but nothing for my self to my own house.
Well, now it’s decorated and stands in the window of the bedroom (I have daily lenses and always forget to switch to glasses before going to bed. This jar come about by chance and has remained since . It is ideal to put the lenses in, and then emptying at regular intervals)

Decoreated pringels jar

I have dressed it in white cardstock and then decorated with washi tape, lace, flowers, leaves and pearl maker.
It’s quick and easy to make this type of jar and it fits great to give away some cookies in.

Decoreated pringels jar

Material list:

Christmas Card #3 2015

I didn’t do this card for a challenge, but just because I bought a nice die and wanted to use it at once.
It was, in all honesty, a little difficult to punch out, but with a little practice I got to the hang of it.

Chritmas card with Snowman

The card is 6×6″ and the body is white cardstock. I have used three different patterned paper with snow theme.

Ivy from Marianne Design

In addition to my new die with a snowman I used dies with ivy and pine cones that are embossed and colored with a ProMarker, Tea green.
The border is made with a edge punch and a strip of one of the patterned papers.

Pine cones from Marianne Design

I’ve put the pine cones on 3D pillows to give the card a little life. The ivy is just glued under the pine cones and then a little upturned.

Blue Christmas Card

My lovely snowman! You can use it both with and without the background.

Snow man from Marianne Design

The snowman was given a little sparkels with a sparkly Sakura pen. I you look close you fins some blue snowflakes in the background. Thees are also sparkling but with some silver glitter glue.

Book foldning – Heart in Heart

I have started with something new the last couple of weeks, folding patterns in books or Book folding. I have not come so far that I do custom designs yet, but I have plans.

This is not the first book I folded, actually it’s the second one. The first is not finished yet.

The pattern is made by Annelie Söderwall and you‘ll find her on Facebook in the group SwEa’s Bokvikning! There are 165 sheets and you need a book that is at least 21 cm high.

Material List:


Lilac in a pot

This little lilac is made after an old cross-stitch pattern.

Lilac in a pot

I’ve done it with mini beads, but it goes equally well with larger beads.
My lilac are 5×3 cm.

Material List:

You can download the pattern of the Lilac in a pot by clicking on the button


Please leave a comment if you use my pattern. It’s fun to see what others are doing 🙂


Translation

2015-06-08
The main menu is up and working (fingers crossed). I have a couple of new post that are translated and I have begun the work of translating my way back. I still have a lot of the pages left I’m sorry to say. My first plan was to do all the pages to begin with and then one category with posts at a time, but I quickly find out that that doesn’t gonna work. For an example. To the left you see a couple of images under the heading Crafted by me. If you click on one of the images you are supposed to come to the post with the image. If I haven’t translated that post that isn’t gonna happend. So… what to do? Still translate all the post about my cats or translate thees post first, even if the post aren’t in the same category? Of course I translate a little bit here and a little bit there instead of being structured and have a plan.
So, on this date you find some new post (2), some old post (5), some pages, some menus and a little here and there. Hope you find something good 🙂


2015-05-25
Wow, the first post is translated and live! It’s a little bit scary right now, it’s a lot of work behind it and I don’t feel totally safe with my new plugin just yet. All the work behind the scene is not finished yet, but I just had to give it a try 🙂 Back to the boring translation now 😉
Hope you still with me!


2015-05-18
Step 1 is done in the fight with my translation plugin. All my old translations is gone and I have to start all over again. My new plugin is working in a different way, and it only showing post/pages/menus/tags… that are translated. Because of this, you wont be able to see any translations in awhile. I have to work my way from the inside and out, right now I’m translating all my categories and tags (and a lot of tags is thrown out of the window, what have I been thinking sometimes???)
Please bear with me, I try to work as fast as I can without stumbling on the way. I post my news here if you are interested in the progress…

Love

Play with dies

I have rediscovered all my dies and has begun to use them in  new ways and way more often. I think I can thank my new storage for it. More about that storage a bit later.

Card with coffee cups

When I made this card I sat and played with a die from Marianne Design that I have had in over a year but never used. I tend to either start a card with a paper or an image or stamp. This time it doesn’t came out like I had imagined it at all.
The card is 6×6″ and has a frame of white cardstock.
I’ve only used a pattern paper, but both sides.

Flowers in the corner

One of the corners got a whole bunch of flowers and some butterflies. The half beads are milky-white and faceted rather than completely round.

Pile of coffee cups

The cups are trimmed to look as if they are in each other. I’m not to happy with the result, so next time I will probably cut a gap in the blue cup and insert the white etc.

Material list:


Decoupage on a tin can

A tin of baked beans might not be the finest thing, but with a make over it can look fabulous.

Tin can

I removed the label on the jar, washed it out well, and then painted it white. I used ordinary wall paint in two layers. The second layer I painted very sloppy to get small differences when I glued on the napkin.
Tin can with flowers
I use a matte decoupage glue. It becomes a more painted surface then. Then I attached a ribbon, tied a bow and finished with little flowers and butterflies in paper.
Tin can

Material list:

Print & Cut with the Silhouette

Silhouette Studio has a feature called Print & Cut. I like this feature and use it to print pictures and cut them with the Silhouette. I then use them as a motif on cards and other things I create.

We start from the beginning and take a look in Silhouette Store. How do I know that the file I buy is a Print & Cut?

Silhouette Store

To begin with, you can use Filters if you are sure that it’s a Print & Cut file you want. Otherwise, you will see it on the little blue box with a P next to the price.

Silhouette library

After purchasing a file and it is located in your library you find the same symbol at most of the files. I have no knowledge of why not all are shown with the symbol, it can be rally annoying sometimes. The rose in the center of this picture is also a Print & Cut, but it’s hard to know without the symbol.
If you know why, please leave a coment to this post. I whant to know!

Change the properties of the file

My solution to this problem is to change the name of the file. You do this by right clicking on the image and choose Edit Properties.

Edit properties

Here you can change the search term, information and the name of the file. I choose to add PnC to the filename.

New name

Close the library and open it again (or change file), now you see the new name and you get a clue as to what file it is.

Shall we get started then? With the actual printing and cutting?

Start by changing the paper to A4, letter or what size your printer use, especially if you use a Silhouette Cameo. Since we are printing these shapes, the paper must fit in to your printer.

Shapes on the mat

Choose your shapes and place those on the mat, just as you do when you want to cut out a shape. If you look at my figures you will see that two have white backgrounds. That’s not important, it’s more that the person who made the file might not have been as accurate as I would like.

Registration marks

Open the Registration Marks. You’ll find it right in the tool menu.

Use Registration Marks

Change the settings needed. Right now, just change the type of machine you have. I have an old friend, so I choose Original. The positions can be left as is, even though they can easily be moved to save paper.

Registration marks on the mat

As you see now, I have my shapes at the wrong place. It is the black corners that will be printed with your shapes. These corners can be moved (see above), but we are content to have those where they are this time.

Move the shapes

Move the figures inside the markings.
Then cut the paper you want to use in order to fit your printer. A cardstock or similar paper (12″x12″) you cut to 21×29,7 cm (A4).
Place your paper in the printer. Remember to have any structure in the right direction if you want it visible or not in your figures. Make sure you printer are online.

Print you shapes

Usually it’s about now that you click Send to Silhouette, but we should send it all to your printer instead. Click on the printer icon and print the same way as you normally print documents. I recommend to print in high quality when you know you really want to use the shape.
Don’t do anything with the document in Silhouette Studio while the printer is working.

Fresh from the printer

Now you have a paper that should look something like this. The mark in the bottom corner is not visible on this picture. If you have a Cameo, you may have other types of marks.

Feed it to the machine

Attach your paper to the cutting mat and feed it to the Silhouette just the way you usually do. My old model is practically hand cranked, so do as you are accustomed to do.

Cut Settings

Now you’re on familiar ground. Select the type of paper you used, in this case, cardstock, and start the cutting.
Your paper will go in and out of the machine when it tries to find the black markings. As soon as that’s done the Silhouette starts to cut.

All Done

Now you have one or more shapes to decorate what you want with.

As you probably noticed in this blog, I like to craft with paper, but I know that it is possible to print on a certain type of vinyl and other media. The procedure is the same, but I can not answer how these materials behave or how you use them.


Note:
All files aren’t great, you might have to work a little by your self to get them the way you want. The cow I have used have the cut line a few millimeters off the edge, and the rose isn’t cut between the stems. (A little hard to see here, but it’s easier of the previous photo)

Quality of the shapes


Mobile case with roses

I got tired of my black and white mobile case and made a new one. This time it’s with pink roses. I also tested a new decoupage glue. It should be a little less glossy than glossy, but I want to see if it is as good as my usual brand.

Servett med rosor, glitterlim och decoupagelim

I am using a nice napkin, decoupage Satin from Artemio and a very pink glitter glue.


Mobil case with decopuage

I’ve used the glitter glue on some roses, and then only at the edge of a leaf. There appears little bad in this picture, so I show you a close-up, too.

Närbild på glitterlim

Material list:

My new storage for all my stamps

I’m still working on finding that optimal storage for crafting material. I have shown a long cavalcade of jumbled images, but now the more orderly images are to come.

First up was my stamp storage. I use the same system as before, but needed new boxes.

2013-06-18 21.12.23

This is how it looked on my shelf with my old boxes with stamps. They filled only half the hole in my EXPEDIT (KALLAX) and became a super duper place to put all sorts of stuff on (and dust). So instead of having my stamps easily available in four boxes (the hole below it looked just as messy) they became virtually completely inaccessible to me. This led in turn to that I didn’t put back the stamps I had  used or put any new stamps where they would be, but let them clutter my desk instead.

new-boxes-01

Now all my stamps moved into the same hole in the shelf. I have bought LEKMAN from IKEA, the one with two small drawers. Two of thees units fit on each other, so I got a free hole on the fly.

new-boxes-03

In each box, I have room for 40 soft CD pockets. I have mixed rubber stamps and clear stamps. If you only have clear stamps you can fit more pockets in.

new-boxes-02

Just to try it out, I bought three of thees drawers. In the third I put a lot of ribbons, and I will certainly add more boxes for those. Each drawer swallows much ribbon, so I got a lot of new space with just one unit. On top I now have a candy box with lace and my storage with card frames.

2013-06-18 21.12.58

Here is the old storage for my ribbons. The hole where the box with dots are. It was messy and I didn’t find anything either.

new-boxes-04

I took the opportunity to acquire a large LEKMAN too. It contains all my punches (not border punches and corner punches). The weight can be a small problem, but it works well when it is so close to the floor, but I would not recommend to have heavy stuff in this box, if it is higher.
On the shelf above, I now have lots of flowers that have been forgotten in a drawer in my desk.

2013-06-18 21.11.13

This is how it looked before. Big punches in an ugly cardboard box and small punches in a crowded box on the shelf above. Not tidy and not particularly dust-free either. Moreover Junior wanted to climb into that box every time he could.

When I look at these before and after photos, I see that I have worked a little more than what’s really visible. I have changed boxes to candy boxes in many cases and then got it neater. I must say that candy boxes does not solve everything, but they can be stacked on each other anyway…..